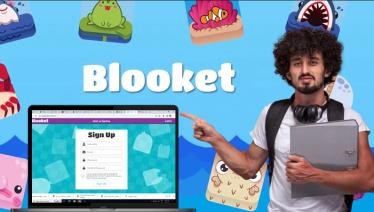
Blooket is a popular educational platform that transforms learning into a fun and interactive experience. With its game-based format, Blooket engages students in a way that traditional methods often can’t. Hosting a Blooket game is straightforward, but to ensure a smooth and enjoyable experience, it’s essential to understand each step of the process. In this guide, we’ll walk you through everything you need to know to host a Blooket game, from setting up an account to troubleshooting common issues.
What is Blooket?
Blooket is an online platform that combines learning with gaming. It allows teachers to create or choose from pre-made question sets and turn them into interactive games that students can play on their devices. The platform offers various game modes designed to enhance the learning experience through competition and engagement. Blooket covers many subjects, making it a versatile tool for educators across different grade levels.
Setting Up a Blooket Account
Before you can host a Blooket game, you’ll need to set up an account. Start by visiting the Blooket website and signing up for free. You can register using your email address or through Google. Once registered, you’ll have access to all of Blooket’s features, including creating and hosting games, tracking student progress, and accessing various game modes. Setting up an account is simple and only takes a few minutes, making it easy to start.
Exploring the Blooket Dashboard
Once you’ve created an account, you’ll be taken to the Blooket dashboard. This is your control centre, where you can create, manage, and host games. The user-friendly dashboard has clearly labelled sections for My Sets, Discover, Recent Games, and more. Take some time to explore the dashboard and familiarize yourself with its layout. Understanding and navigating the dashboard will make hosting a game much more straightforward.
Creating a Game Set
To host a Blooket game, you’ll first need to create a game set, a collection of questions your students will answer during the game. You can create your own set from scratch or use one of the thousands of pre-made sets on the platform. To make a set, click “Create” and add your questions. You can choose from various questions, including multiple-choice, true/false, and short answers. Once your set is complete, please save it to your dashboard for easy access when you’re ready to host a game.
Choosing a Game Mode
Blooket offers a variety of game modes, each with its unique gameplay mechanics. Some popular modes include Tower Defense, Gold Quest, and Cafe. Each mode provides a different way to engage students through strategy, speed, or collaboration. When choosing a game mode, consider your lesson’s objectives and your students’ preferences. For example, a mode like Factory or Battle Royale might be ideal if you want to promote teamwork. Exploring the different game modes will help you select the best one for your needs.
Hosting the Game
Once you’ve created your game set and chosen a mode, it’s time to host the game. To start, click on the game set you want to use and select the “Host” button. You’ll then choose the game mode and configure the game settings, such as the number of questions and time limits. After setting up, Blooket will generate a unique game code that your students can enter to join the game. Share this code with your students and wait for them to join. Once everyone is in, start the game and let the fun begin!
Engaging Students During the Game
Engagement is critical to a successful Blooket game. As the host, you can keep students engaged by encouraging friendly competition, providing feedback, and monitoring the game’s progress. Blooket allows you to monitor student responses in real-time, so you can see who is excelling and who might need extra help. Offering praise and tips throughout the game can also enhance the experience and motivate students to participate actively.
Tracking Student Performance
After the game, Blooket provides detailed reports on student performance. You can view how each student answered the questions, their accuracy rate, and their response time. This data is invaluable for assessing student understanding and identifying areas where they may need additional support. You can access these reports directly from your dashboard to guide future lessons or provide targeted feedback to students.
Troubleshooting Common Issues
While Blooket is generally easy to use, you may encounter some common issues when hosting a game. For instance, students might have trouble joining the game, or there could be connectivity issues. If a student cannot join, double-check the game code and ensure it’s entered correctly. For connectivity problems, advise students to refresh their browser or check their internet connection. Familiarizing yourself with these potential issues and their solutions will help you quickly resolve any problems during the game.
Tips for a Successful Blooket Game
To ensure a smooth and enjoyable Blooket game, keep these tips in mind:
- Prepare in advance: Create your game set and familiarize yourself with the game mode before hosting.
- Test the technology: Ensure that your device and internet connection are stable.
- Keep it fun: Blooket is meant to be enjoyable, so encourage a playful and positive atmosphere.
- Encourage participation: Make sure all students feel included and motivated to participate.
- Review the results: Use the performance data to reinforce learning and provide feedback.

